Wednesday, February 27, 2013

Chicken and Broccoli Alfredo

This recipe comes from a back issue of Bon Appetit, I found the recipe on Epicurious.com.  I typed in "chicken and broccoli" and found this recipe to be appealing.  I got to use my new Le Creuset Dutch (or was it French) Oven that I got for my birthday!  I was excited to use it (if you couldn't tell my the exclamation mark) and I like it a lot more than my non-stick cookware.  The only down side to Le Creuset is you have to be very careful when cleaning them (as you would with any enameled cookware), but you can use them anywhere, on top of the stove and in the oven up to 800 degrees.  I don't know what food substances need an 800 degree temperature, or even if my oven goes up to 800, but if you find some, let me know.  I'm very curious.

Anyway, this was our dinner last night, and it was very easy to make, and it came out delicious.  I haven't been eating a lot of pasta lately, so while eating this dinner, I was getting really full fast.  I also think we used brown rice penne, which to me, is more filling.

Here's what you'll need:
  • 4 to 5 cups broccoli florets (1 large bunch)
  • 2 tablespoons olive oil
  • 4 skinless, boneless chicken breast halves, cut crosswise into 1/2 inch strips
  • 1 large red bell pepper, thinly sliced
  • 1 2/3 cups whipping cream
  • 1 1/2 cups grated Parmesan cheese
  • 1/2 cup grated Monterey Jack cheese
  • 3/4 pound penne or mostaccioli, freshly cooked
First cook the penne, while slicing chicken, pepper, and broccoli.  Set aside when finished.
Steam florets for about 3 minutes.  Preheat broiler.  I set mine to high, but I think  lower setting would be better.
Butter a 13x9x2" baking dish.  Heat 2 tablespoons olive oil in a heavy large Dutch oven over medium high heat.  Working in batches, saute chicken strips until just cooked through, about 4 minutes.
Transfer to a bowl.  Add pepper slices and saute until just tender, about 5 minutes.
Add whipping cream, 1 cup Parmesan and all Monterey Jack cheese.  Simmer until sauce thickens slightly, about 5 minutes.
Add chicken, pasta, steamed broccoli and toss until sauce coats mixture, 3 minutes.  Season to taste if you wish.
Transfer to dish and sprinkle with the 1/2 cup of Parmesan cheese.  Broil until just golden on top, about 3 minutes, and serve.
Enjoy! 


Tuesday, February 26, 2013

My version of the Green Smoothie

Lately, when I don't have enough time in the morning to make my oatmeal, I make a smoothie instead.  I've seen this type of smoothie all over the place, in food blogs, on youtube.com, and some of my vegan cookbooks.  I mix it up every now and then and either leave out the banana, same with the flax seeds and protein powder

Here's what you'll need:

1 cup unsweetened vanilla almond milk
a handful or two of spinach leaves (don't worry you won't taste it in the smoothie)
1 banana (optional)
4 pieces of frozen mango
1/4 cup to 1/2 cup mixed frozen berries (I usually use Trader Joe's frozen berry medley or blueberries, blackberries, strawberries, and raspberries.)
 1 tablespoon of flax seed meal (optional)
1 tablespoon vanilla rice protein powder (optional)

In a blender combine the almond milk and spinach and blend until smooth.  Next add the banana, mango, and flax seeds, and blend once again.  Finally add the berries and the protein powder and blend until smooth.  You may not need to blend it three times, but I try to get my smoothies as smooth as possible.

Enjoy! 

Sunday, February 24, 2013

Chocolate Cream Cheese Cake

Yes, that's my homework under my dessert.

Let's make this clear, this isn't a cheese cake, this is a cake with cream cheese in it.  I wasn't sure how it would turn out, but it came out very tasty and filling.  It was very chocolaty, not very moist, but still very good.  I baked this last weekend when I should have been doing my homework.  I had a huge craving for chocolate though, so I took a break from my accounting studies. 

Here's what you'll need:
2 cups hazelnut flour
2 cups almond flour
2 1/2 cups Stevia Extract in the Raw or 1 1/4 cups New Roots Stevia Sugar
3/4 cup unsweetened natural cocoa powder (not Dutch-process)
2 teaspoons baking powder
1/2 teaspoon salt
5 eggs
8 ounces cream cheese, at room temperature
3/4 cup salted butter melted
2 teaspoons vanilla extract
1 1/2 teaspoons liquid stevia

First preheat the oven to 375 degrees.  Grease a Bundt pan entirely with butter and place it in the freezer.

In a large bowl, combine the hazelnut flour, almond flour, stevia, cocoa powder, baking powder, and salt and whisk until well mixed.
In a large bowl, combine the eggs, cream cheese, butter, vanilla, and liquid stevia and mix with an electric mixer at medium-low speed.
Add the flour mixture one or two cups at a time, and mix at medium-low speed until it makes a smooth, thick, pourable batter. 

Remove your prepared pan from the freezer, then dust the entire inner surface with almond, pecan, or coconut flour (I used coconut because I have a lot more of it than the other two).  Pour the mixture into the prepared pan and jiggle it to evenly distribute the batter into every nook and cranny.
Bake for 30 minutes, then gently rotate and bake for 20 to 30 minutes, until the cake is springy when pressed in the center and a toothpick inserted into the middle of the cake comes out clean.

Let the cake cool in the pan for 20 minutes before turning it out onto a wire rack.  Let the cool for at least 20 more minutes before slicing and serving.
Enjoy!


Monday, February 18, 2013

Raisin Cinnamon Oatmeal

 This was my breakfast this morning.  I haven't eaten oatmeal since I was a little kid, and back then it was the junky instant stuff from a tiny package.  Today was the grown-up version of my favorite flavor from back then, raisin cinnamon.  I didn't take any pictures because I wasn't thinking of posting this, but since it turned out so well, I decided to.

What you'll need:
1/2 cup rolled oats (no added sugar and no added flavor)
dash of salt
1 cup unsweetened soy milk
1/4 cup raisins
1 package of flaxseed from Carrington Farms' Organic Flax Paks Milled Flax Seeds
1-2 teaspoons of cinnamon (I used Penzeys' because it is the best cinnamon out there, in my opinion.)

Bring the soy milk and tiny bit of salt to a boil.  Lower the heat and add oats.  Cook on medium heat for about 5 minutes stirring occasionally.  Transfer to a bowl and stir in flaxseed meal and raisins.  Add the cinnamon and stir once more.  Eat and enjoy! 

Monday, February 11, 2013

Cinnamon-Apple Muffins

This recipe comes from The Joy of Gluten-Free, Sugar-Free Baking (I told you I would be using this cookbook a lot).  I made the recipe yesterday morning and they turned out very yummy.  The recipe didn't make a lot of them, the recipe says 9, but I was only able to make 8.  I'm trying not to eat them all within a couple of days, it's been difficult because they're really good.

Here's what you'll need:
3/4 cup hazelnut flour
3/4 cup almond flour
1/2 cup Stevia Extract in the Raw
1 tablespoon baking powder
1 teaspoon ground cinnamon
2 eggs
6 tablespoons unsweetened soy milk or other milk
2 tablespoons unsweetened applesauce
1 1/2 teaspoons vanilla extract
1/2 teaspoon liquid stevia
1/2 cup coarsely chopped apple (about 1 large apple)
1/4 cup chopped almonds, pecans, hazelnuts, or walnuts (which was used in this recipe) for garnish

Preheat the oven to 350 degrees.  Line 8 or 9 muffin cups with paper or foil liners, then mist them with spray oil.

In a medium bowl, combine the hazelnut flour, almond flour, stevia, baking powder, and cinnamon and whisk until well mixed.
In a large bowl whisk the eggs, milk, applesauce, vanilla, and liquid stevia together until thoroughly blended.
Add flour mixture and stir with a large spoon for 1 to 2 minutes to make a smooth, sticky batter.  Fold in the apples.
Spoon or scoop the batter into the prepared muffin cups, dividing it evenly among them; the muffin cups should be just about full.  Sprinkle the nuts evenly over the muffins.
Bake for 20 minutes, then rotate and bake for about 20 to 25 more minutes, until golden brown and springy when pressed in the center.
Let the muffins cool in the pan for at least 5 minutes before turning them out onto a wire rack.

Enjoy!


Sunday, February 10, 2013

Cheesy Herbed Pizza Crust Pizza

Before I tell you how to make this pizza, let me tell you this:  This was the most delicious pizza I have ever eaten!  I have had gluten free pizza in the past and it was never this good.  I have also grown up outside New York City where pizza parlors are on every corner and every Friday night when I was younger, we would order pizza.  So I know good pizza and I know great pizza, and this was beyond great, in my opinion anyway.  Maybe it was the flavoring in the crust, maybe it was because it was homemade, or maybe it was the Penzeys' pizza seasoning I used.  Either way, I highly recommend making this pizza crust the next time you make a homemade pizza.

Here's what you'll need:
1 cup sunflower seed flour (buy sunflower seeds and grind them in a mini-food processor)
1/2 cup garbanzo bean flour (not garbanzo fava bean flour, there is a difference)
1 teaspoon baking powder
3/4 teaspoon onion powder
1/2 teaspoon salt
1/2 teaspoon ground black pepper
1/2 teaspoon dried oregano
1/4 teaspoon dried thyme
1/4 cup shredded or grated mozzarella cheese
1/4 cup shredded or grated cheddar cheese
2 egg whites
1/2 cup low-sodium chicken broth

Preheat the oven to 325 degrees.  Brush the surface of a 12-inch round pizza pan with olive oil.

In a medium bowl, combine the sunflower seed flour, garbanzo flour, baking powder, onion powder, salt, pepper, oregano, and thyme and whisk until well mixed.
Stir in the cheeses and stir the mixture to distribute the cheese.
In a separate bowl, whisk the egg whites and broth together until thoroughly blended.
Add the flour mixture and stir with a large spoon for 1 to 2 minutes to make a thick sticky dough.
Transfer the dough to the center of the prepared pan.  Using oiled fingers, press it out to evenly fill the pan, making the edges slightly thicker if you like.  Prick the surface every 1 to 2 inches to help prevent bubbles and air pockets during the baking.
Bake for 15 minutes, then rotate and bake for 15 to 20 minutes, until lightly browned and firm to the touch, with blisters of melted cheese all over.
You can immediately top the crust with your favorite toppings.
To bake the topped pizza, have the oven at 325 degrees and bake for 6 to 8 minutes, or until the cheese has melted or until the toppings are heated through and cooked to your liking.
Slice and serve immediately.  Enjoy!


Saturday, February 9, 2013

Basic Brown Bread

Hi, everybody!  Today's recipe comes from The Joy of Gluten-Free, Sugar-Free Baking.  It's starting to become my go-to cook book when it comes to baking goodies for myself.  I just received in the mail either this week or late last week, two new cook books on how to bake using alternative flours. One is all about coconut flour (which I have a lot of), and the other focusing on almond flour.  Hopefully, I'll get to those books sooner rather than later, but don't count on it because school is my number one priority right now (as it should be).

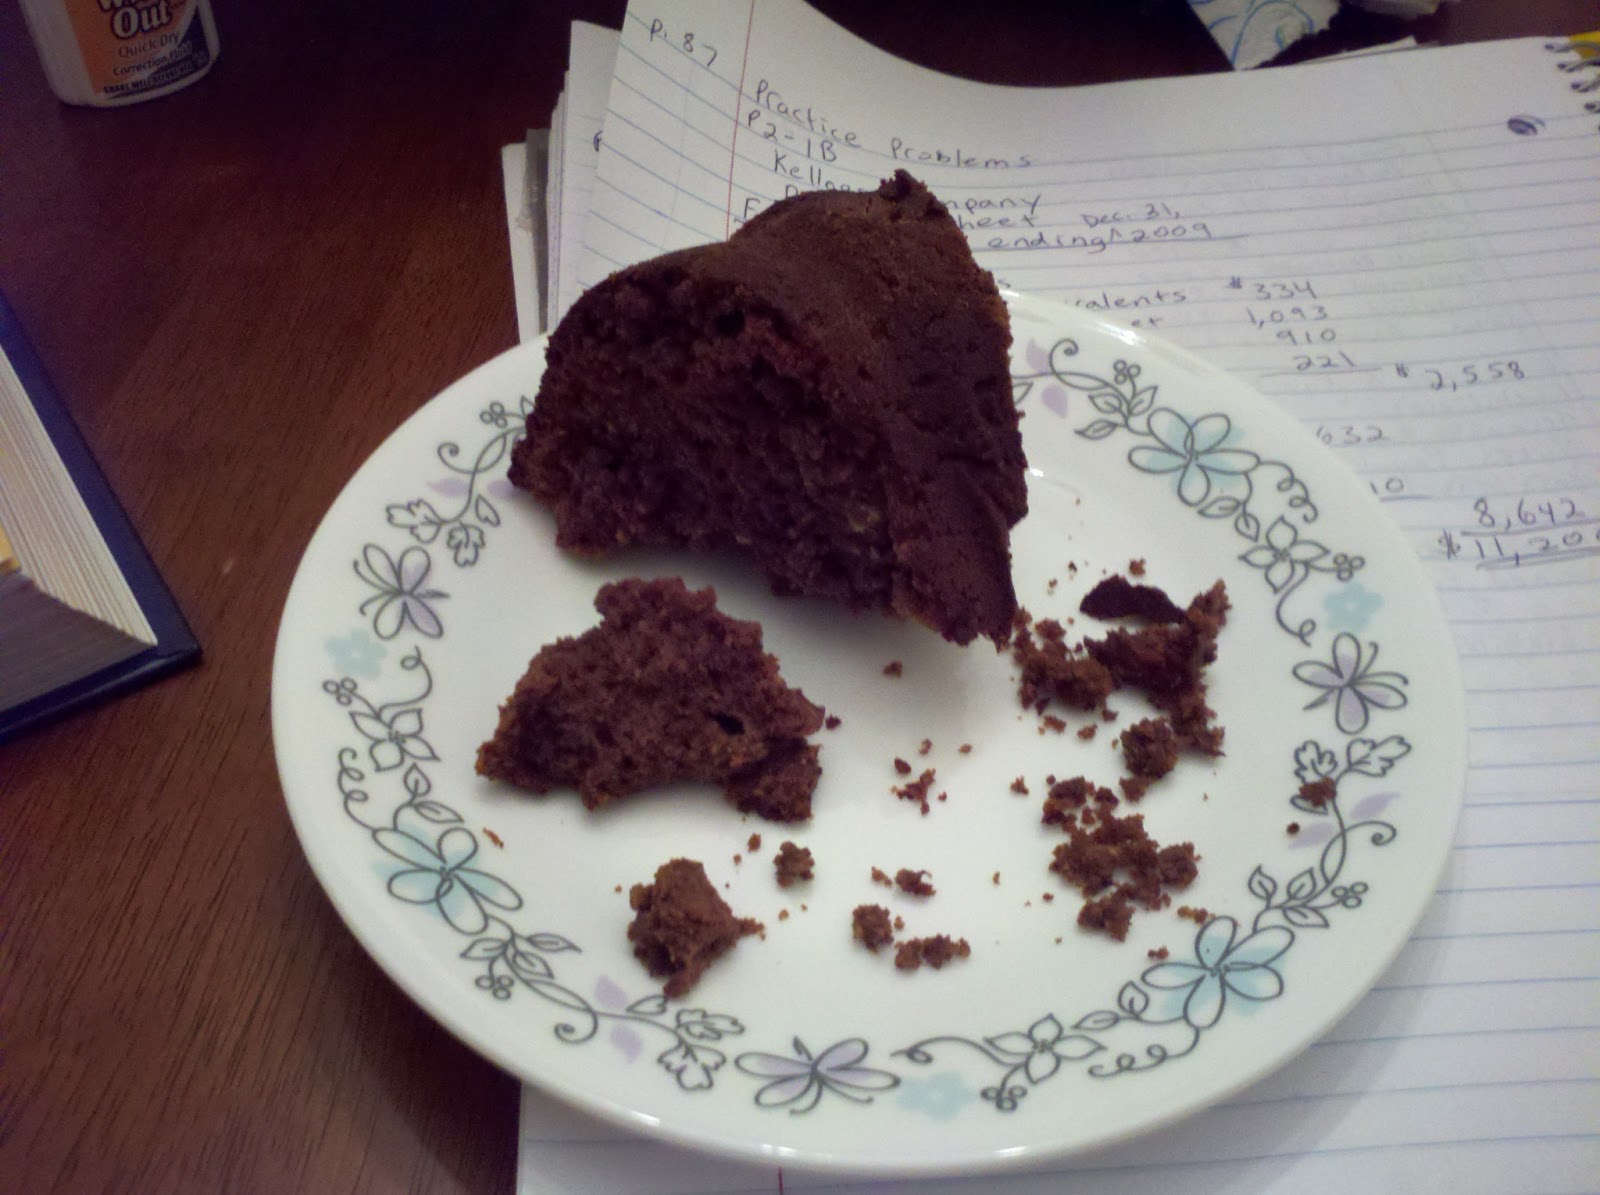
This bread looks more like a banana bread, and is very filling, it also has a very nutty taste to it.  It's also extremely healthy for you considering it has two cups of flaxseed meal in it.

Here's what you'll need:
2 cups brown or golden flaxseed meal
1 cup hazelnut flour (the most expensive flour I've bought to date)
1/4 cup Stevia Extract in the Raw or Splenda
4 teaspoons baking powder
1 teaspoon xanthan gum
1/2 teaspoon salt
4 eggs
1 cup unsweetened soy milk or other milk
1/4 cup water
1/4 cup salted butter melted

Preheat the oven to 375 degrees.  Line the bottom of a 4 1/2 by 8 inch loaf pan with parchment paper, then mist the pan with spray oil.

In a medium bowl, combine the flaxseed meal, hazelnut flour, sweetener, baking powder, xanthan gum, and salt.  Whisk until well mixed.
In a large bowl or the bowl of an electric mixer (which the recipe recommends), combine the eggs, milk, water, and butter and whisk or mix with the paddle attachment at medium-low speed until thoroughly blended.
Add the flour mixture and stir vigorously with a large spoon or mix at medium speed for 2 minutes.  Scrape down the sides of the bowl, then stir even more vigorously by hand or mix at medium-high speed for 2 minutes to aerate the batter.  It should be smooth, sticky, and pourable.
Pour mixture into the prepared pan.  Bake for 35 minutes, then rotate and bake for about 35 minutes, until golden brown and springy when pressed in the center and a toothpick inserted into the middle of the loaf comes out clean.
(I can't tell if this picture is pre-oven or post-oven...sorry.)

Let the bread cool in the pan for at least 10 minutes before turning out the loaf.  Let cool on a wire rack for at least 30 minutes before slicing and serving.
Enjoy! You can put anything on this bread too, cheese, turkey, peanut butter & jelly, or butter like I did this morning. 


Saturday, February 2, 2013

Peanut-Crusted Chicken Breasts with Cilantro-Garlic Sauce

Sorry for the bad lighting in all of the pictures for this post, but I have finally replaced the light bulbs in my kitchen.  For the longest time I was using only one light bulb in the ceiling fixture when I'm really supposed to have three!  I know, I'm lazy when it comes to the simplest of things.  I'd also like to apologize for not posting as often as I'd like.  I'm back in school now, and some of the classes I am taking require a lot of studying, like my Financial Accounting class.  My professor for that class thinks he's such a great teacher, but really all he does is reread from the text, and won't explain things further than that!  As for my other classes, one of them is on-line, and the other is a computer class which I thought I would hate, but so far it's my favorite.  The last class I have I still have not met with due to the class being on a Monday and classes officially started on 1/22 which was a Tuesday.  Also this past Monday, our classes were canceled because of the snow/ice storm.

Now onto the chicken recipe, also another apology, I'm on a diet and you'll probably be seeing a lot of chicken and fish recipes because I need to lose this extra weight I've been carrying for the past four years.  This recipe came from my Robin Takes 5 cookbook.  Each recipe has five ingredients (sometimes six), and they are all very simple and quick to do.

I wasn't a big fan of this chicken recipe, I still ate it all, but I don't think it's a recipe I will ever make again.  I don't know what I didn't like about it, the peanuts or the sauce.  I think it was the sauce, I really hated the texture and the blandness that came with it.  But hey, you might like it! 

Here's what you'll need:
4 boneless, skinless chicken breast halves (about 5 ounces each)
1 tablespoon olive oil
1 cup finely chopped dry-roasted salted peanuts
1 cup reduced-sodium chicken broth
1 cup fresh cilantro leaves
2 cloves garlic, chopped

Preheat oven to 375 degrees.
Brush the chicken all over with the oil and transfer the chicken to a shallow baking dish.  Season the top of the chicken with salt and freshly ground pepper.  Arrange the peanuts all over the top of the chicken.
Bake for 25 to 30 minutes, until the chicken is cooked through.
Meanwhile, combine the broth, cilantro, and garlic in a blender and puree until smooth.  Transfer the mixture to a small saucepan and set the pan over medium heat.  Bring to a simmer and cook for 5 minutes.  Season to taste with salt and freshly ground black pepper.
Serve the chicken with the cilantro sauce spooned over the top.
Enjoy!